Learn 101- Basic
Section outline
-
-

-
Click on this link to connect to connect to the complete users guide for setting up and maintaining your LEARN page.
-
-
This is the first topic we will be covering. Here is a photo...

-
Please enter whatever goals you came with to training today.
-
Here is where I can provide addition instructions/details/guidance.
-
LEARN is SUSD's Learning Management System. Basically think of it as a digital version of your classroom, or a place where student can connect directly to a variety of web resources which you create and manage.
A LEARN course page has three main areas; the Header Box along the top of the page, Topic Folders which are arranged below the header box, and Content Blocks which live along the side of your course page.
Q: How might these different areas within a LEARN page correspond to different areas within a typical classroom?

-
-
Click here to go to the LEARN Course DEMO folder
-
Select a Course Page that DOES NOT have a name associated with it (e.g. "NTO Copy 1")
-
Enter the Enrollment Key provided for you by your Trainer to log in to the course as a teacher.
-

- Remember to change the name of your course right away so that others will know that the course has been claimed.
- Click on the Turn editing on button along the top of the page to get started.

-
-
Renaming your course, changing the format of your course, controlling the number of weeks/topics in your course
-
-
Image of where these essential settings are located on your Settings page
-
Reference page that goes into great detail on each option on the settings page, for the curious.
-
-
What you need to get started adding content
-
Essential information to begin adding and editing text to your course including turning editing on, understanding the icons and branding your course.
-
-

One of the great things about Moodle is that it allows you to add a variety of Blocks to your course page to meet your needs and the needs of your students. Here's how...
1. Make sure that editing is turned on
2. Click on the "Add a Block Menu" to select the block you're looking for

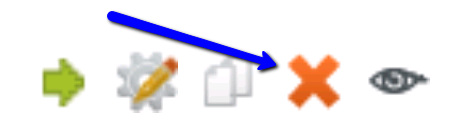
3. Once the block has been added, you can move it to a different location by dragging with directional arrow icon or detete it by clicking on the red X.
Adding a Custom Text BoxTo add a custom text box, select HTML in the "Add a Block" menu.
This will bring up all of your standard toolbar settings which will allow you to add whatever you like to a block.

-
This section of Learn 101 identifies and defines the various resources you can add to your course.