Personalize PowerTeacher
| Site: | Sunnyside LEARN |
| Course: | PowerTeacher Training |
| Book: | Personalize PowerTeacher |
| Printed by: | Guest user |
| Date: | Wednesday, April 15, 2026, 9:22 PM |
Description
In this lesson you will learn...
- how to set the default student screen
- how to show section numbers by default
1. Personalize Overview
Personalize Overview
Use this page to customize PowerSchool to make the system more convenient for your daily needs. Either keep the default settings, change your preferences now, or wait until you are more familiar with PowerSchool. Change any combination of the settings as often as you want.
On the start page, choose Personalize from the main menu. The Personalize page appears.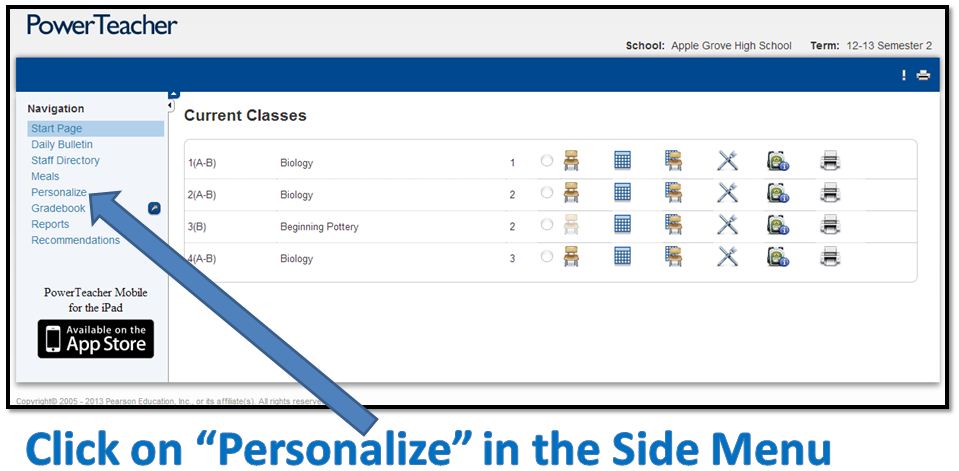
2. Personalize - Options
Personalize - Options
The Personalize Functions allows the user to personally craft three different areas of the PowerTeacher userface:
1. Password
2. Default Student Screen
3. Show Section Numbers
Instructions on how to perform each task are included in the subsequent pages of this LEARN book.
3. Personalize - SUSD Disclaimer

Sunnyside Unified School District employees cannot change their PowerTeacher passwords. If you decide to change your password it will change and work for the day. However, the likelihood of it reverting back to your District password is very high. If you would like to change your password for PowerTeacher you must change your District password. Directions for changing your district password are explained below:
Changing your SUSD login password:
1) Login into a district computer with your current username and password.
2) Once you have logged in press Ctrl+Alt+Delete Simultaneously
3) Select "Change a Password" from your list of options
4) Enter your old password & new password in the corresponding fields. Click OK or Blue Arrow.
5) Log out and log back in using your new credentials to confirm the change.
6) Your new password should now be used to access the PowerTeacher.
7) If the change does not take affect, please contact HelpDesk - 545-4357
4. Personalize - Set the Default Student Page
Personalize - Set the Default Student Page
Personalize the default page when working for a student.
1. On the start page, choose Personalize from the main menu. The Personalize page appears.
2. Click Default student screen. The Personalize - Initial Student Screen page appears.
3. Choose an initial student screen from the pop-up menu. This will be the default page that appears when you select a student record.
4. Click Submit. The Changes Recorded page appears. The next time you select a student, the student page you chose will appear.
Note: After selecting a student, the default student page appears unless you viewed a different student page since you logged in to PowerSchool. For more information, see Work With an Individual Student.
5. Personalize - How to Display Section Numbers
Personalize - How to Display Section Numbers
Section numbers for each class do not display by default. You must set the preference to display section numbers.
1. On the PowerTeacher main menu, click Personalize. The Personalize page appears.

2. Click Display Section Number.
3. Choose Yes from the Display Section Number pop-up menu.
Note: To remove the section number, choose No.
4. Click Submit.
5. Log out of PowerTeacher.
6. Log in to PowerTeacher. The section number for each class appears.
Note: If there are no current classes assigned to the teacher, the message "You do not have any current classes" appears on the PowerTeacher start page.