Navigating Your Start Page (Center Icons)
| Site: | Sunnyside LEARN |
| Course: | PowerTeacher Training |
| Book: | Navigating Your Start Page (Center Icons) |
| Printed by: | Guest user |
| Date: | Saturday, May 30, 2026, 9:06 PM |
Description
This lesson will introduce the icons in the center of the screen
- Daily Attendance (Chair icon)
- Multi-Day Attendance grid (grid icon
- Seating Chart (chair and grid icon)
- Lunch Counts (not used in SUSD)
- Student Info (back pack icon)
- Reports (printer icon)
Table of contents
- 1. Start Page - Current Classes
- 2. Start Page - Center Icons - Attendance Chair
- 3. Start Page - Center Icons - Multi-Day Attendance Grid
- 4. Start Page - Center Icons - Seating Chart
- 5. Start Page - Center Icons - Lunch Counts (NOT IN SUSD)
- 6. Start Page - Center Icons - Viewing Student Info (Backpack)
- 7. Start Page - Center Icons - Print Reports
1. Start Page - Current Classes
Navigating PowerTeacher
The PowerTeacher Start Page serves as the central point from which you begin your PowerTeacher session. It consists of the following areas: the Navigation bar, the ID bar, the Main menu, and Current Classes (shown below). This book will summarize the central icons in PowerTeacher's Start Page.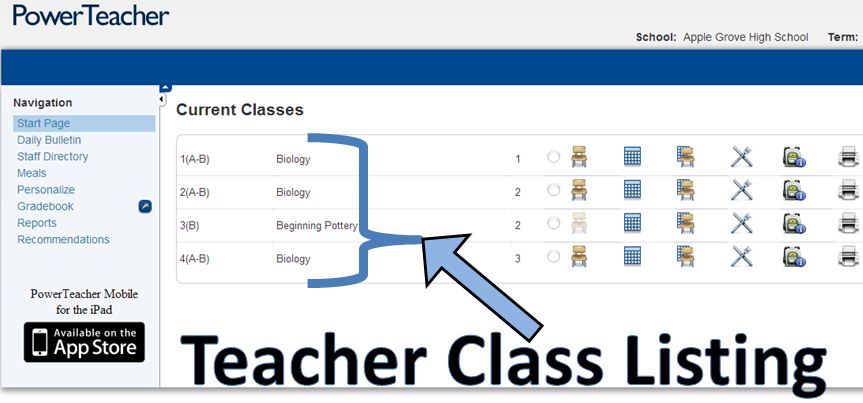
2. Start Page - Center Icons - Attendance Chair
Start Page - Center Icons - Attendance Chair![]()
It’s easy to take attendance in PowerTeacher. As soon as teachers take attendance, student attendance information becomes available to school administrators, parents, and students.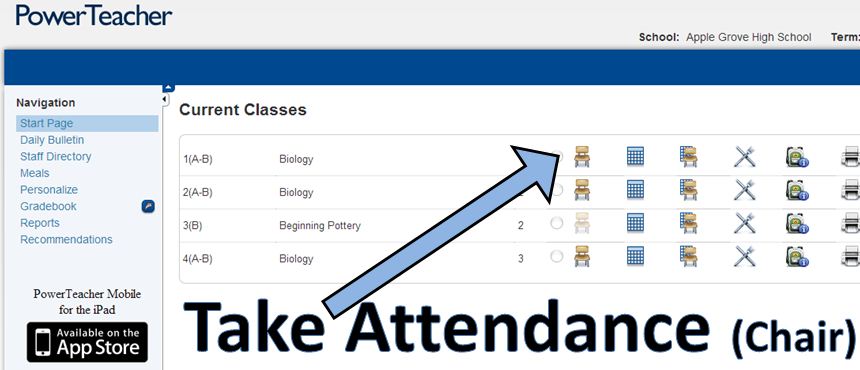

1. Navigate to Start Page > Chair icon (next to the class for which you want to take attendance)
2. Select the Date
3. Select the Current attendance code
4. Click the cell next to a student’s name to assign that code
5. Click Submit
*Note: Even if all students are present, teachers should click the Chair icon to open the attendance screen, and then click Submit.
3. Start Page - Center Icons - Multi-Day Attendance Grid
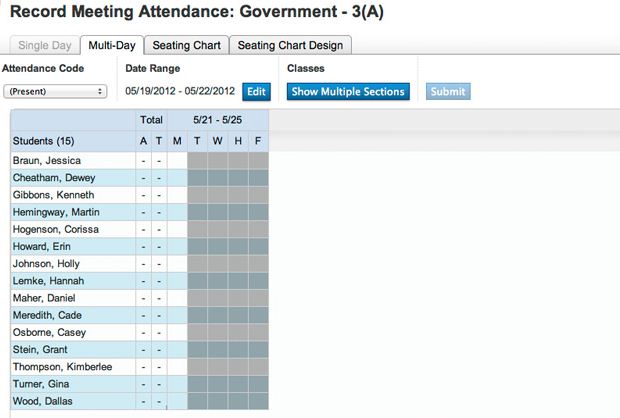
Start Page - Center Icons - Multi-Day Attendance Grid![]()
View multiple days of attendance for the entire class or a single student.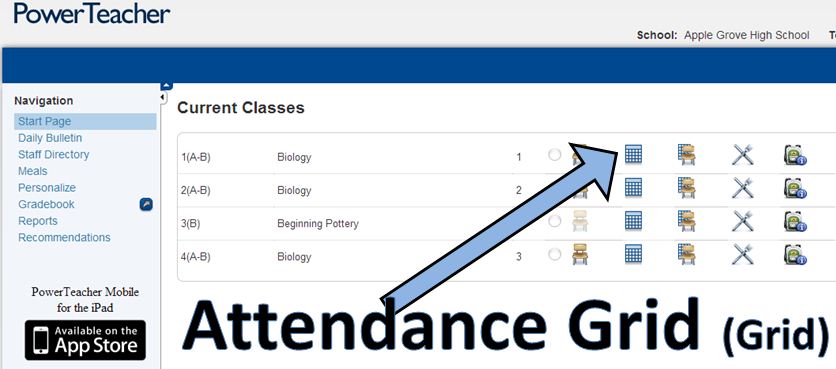
4. Start Page - Center Icons - Seating Chart
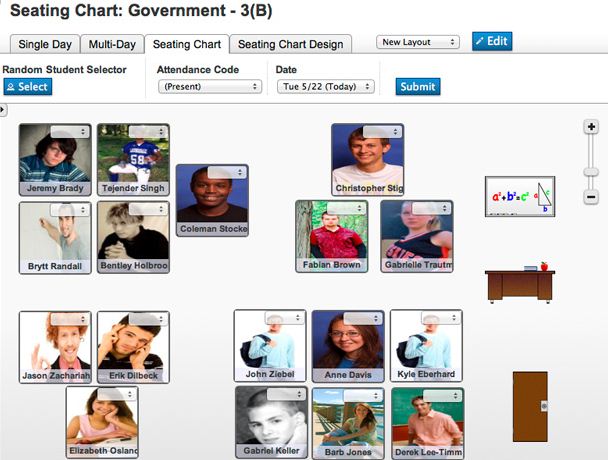
Start Page - Center Icons - Seating Chart![]()
Click grid and chair to work with the seating chart. This includes designing and editing a seating chart layout, taking attendance and more. For more information, see Seating Chart.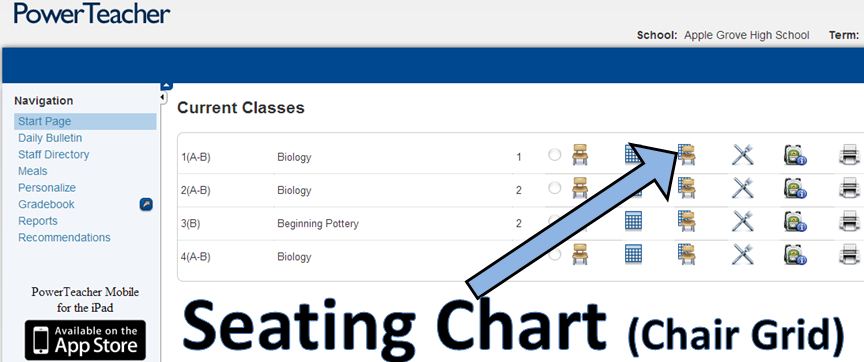
5. Start Page - Center Icons - Lunch Counts (NOT IN SUSD)
Start Page - Center Icons - Lunch Counts
NOT USED AT SUNNYSIDE UNIFIED SCHOOL DISTRICT
Submitting lunch counts in PowerTeacher is just as easy as taking attendance. Whether you submit the lunch count for your students during homeroom or for yourself during another class, the count is included in the PowerLunch Class Counts report. 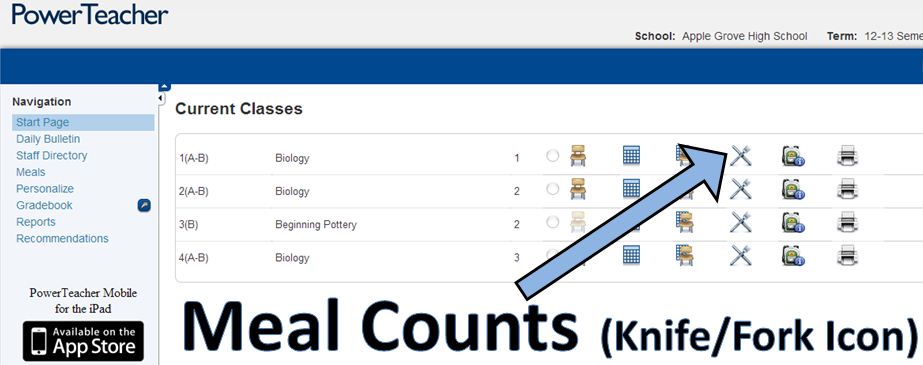
6. Start Page - Center Icons - Viewing Student Info (Backpack)
Start Page - Center Icons - Viewing Student Info (Backpack)
Access the Student Information Screens by clicking the Backpack for a class, then clicking a student’s name.
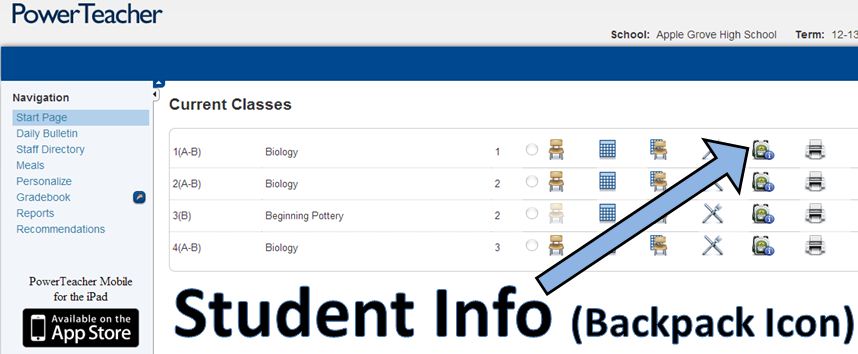
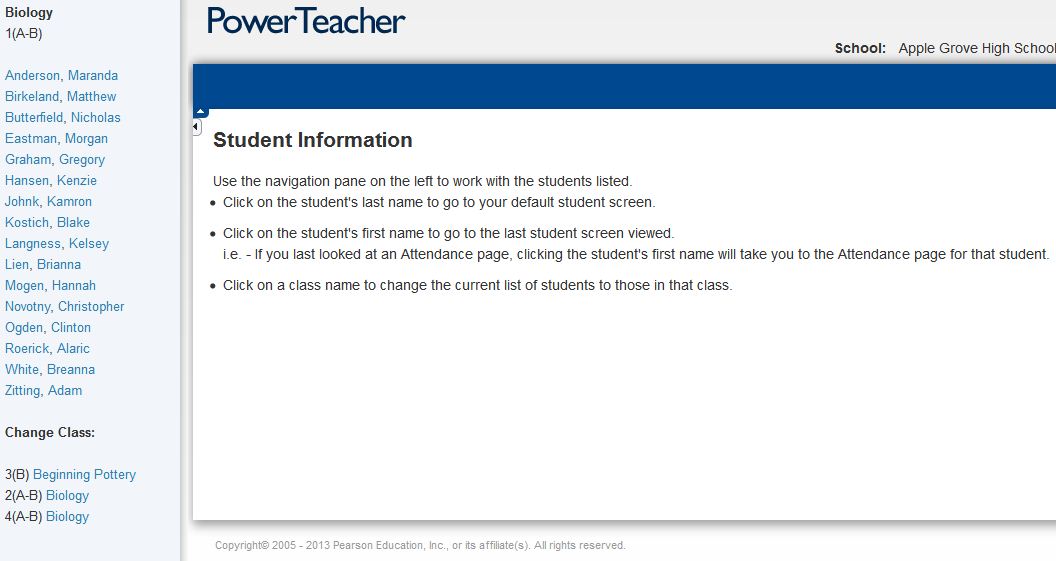
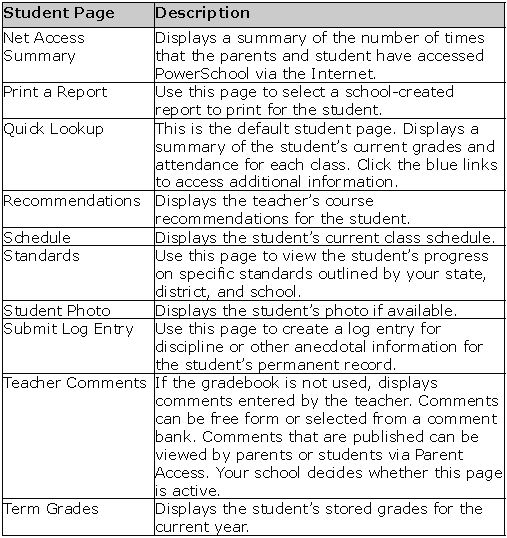
More than a dozen student screens are available through the Select Screens menu. The following table provides a brief explanation of the student information screens available in PowerTeacher.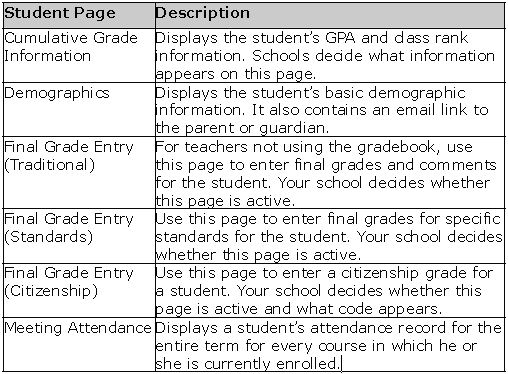
7. Start Page - Center Icons - Print Reports
Start Page - Center Icons - Print Reports
Teachers can print school-related reports such as form letters, report cards, and mailing labels for individual students, one section of students, or for students in all of the sections they teach provided that they have been given permission to do so. Only those reports that a teacher can print will be available in the PowerTeacher print reports menu.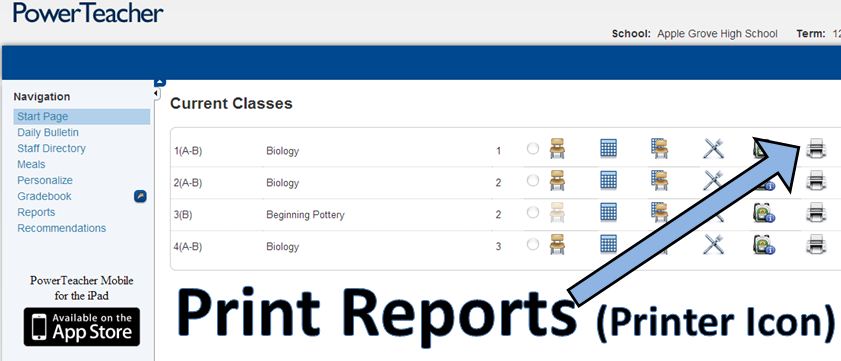
To print PowerSchool reports for an individual student:
1. Navigate to Start Page > Backpack icon
2. Click a student’s name
3. Select the screen Print A Report
4. Select which report you would like to print
5. Select the Watermark Text, if applicable
6. Select the Watermark Mode, if applicable
7. Select when to print the report
8. Click Submit