Essential Course Settings
| Site: | Sunnyside LEARN |
| Course: | Learn 101- Basic |
| Book: | Essential Course Settings |
| Printed by: | Guest user |
| Date: | Sunday, April 19, 2026, 6:19 AM |
Description
Start here to learn about the 3 essential course settings.
1. Introduction
So what are the essential course settings I need to know to begin setting up my class? The following settings are all found under the Settings, Edit Settings link
![]()
We will not be going through every single settings option in this course, as the goal of this course is to get a course site up and running and not get lost in the plethora of options available. We will be looking at changing your course name, changing the format of your course and controling when your course starts and how many topics or weeks you have in your course.
Below is a screen cast showing you how to access your course's Edit Settings page.
2. Renaming your course
In setting up your course there are a handful of settings that are critical. The required fields are denoted in red followed by an *. The course full name and the course short name are two of the required fields.

If you scroll through the whole settings page, you will notice that the only two required fields are the course short name and the course long name.
You can rename your course to whatever makes the most sense to you. The course short name is the name that appears in menus and the breadcrumbs at the top of the screen (see below). Course ID number and course summary can be left blank. If you want to put in a course summary you can, but it is not necessary.
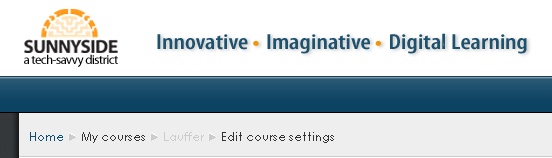
These are the breadcrumbs. They show the user where he or she is in the course.
3. Changing the format of your course
Format Options:
The selection you make here controls how your course looks to you and your students. The default for new courses is the Folder View format. Switch between formats to see how the look of your course changes. This course uses the Folder View Format. If you select a different format your site may look very different. All the functionality will be there, but it may be accessed in a different way.
![]()
Folder View Format – Folder View format is a variation of the Topics format. The difference is the content is collapsed to eliminate the need for an endless scroll. The information in each topic box can be accessed by clicking on the collapsed folder at the top of each section.
Scorm format - This is a format that you would use if you were going to import a course from another system such as Blackboard, D2l etc. SCORM (Sharable Content Object Reference Model) is a collection of specifications that enable interoperability, accessibility and reusability of web-based learning content. This one can be safely ignored.
Social format – This format is oriented around one main forum, the Social forum, which appears listed on the main page. It is useful for situations that are more freeform. They may not even be courses. For example, it could be used as a departmental notice board.
Topics format – Very similar to the weekly format, except that each "week" is called a topic. A "topic" is not restricted to any time limit. You don't need to specify any dates.
Weekly format – The course is organized week by week, with a clear start date and a finish date. Each week consists of activities. Some of them, like journals, may have "open windows" of, say, two weeks after which they become unavailable.
This course uses the Folder format. It would be a good idea to leave your course set to folder format so what you see in this course and what you see in yours looks the same. You can set your own course to whatever format you like afterwards.
4. Controlling the number of topics and when your class starts
Make the necessary selections in these two fields for when you want your course to start and how many weeks or topics it will have. These values can be changed at any time.

The rest of the options in the General Section can be left alone. The default values are just fine.
In fact, the rest of the options on this page can be left as is. The goal here is to get your class set up and begin putting content in it. We will revisit settings when it is time to set the class up so students can enroll.
Scroll down and click on the Save Changes button.